Looking for a durable, eye‑catching exterior that mimics real rock without the hefty price tag? Stone veneer siding delivers a natural stone aesthetic, excellent weather resistance, and relatively low‑maintenance care, making it a top choice for homeowners in 2026. Whether you’re renovating a historic bungalow or adding curb appeal to a new build, this guide explains how to select the right veneer, master the installation process, and keep it looking pristine for years—plus it links to our complete home siding guide for broader context.
What Is Stone Veneer Siding and Why It Matters
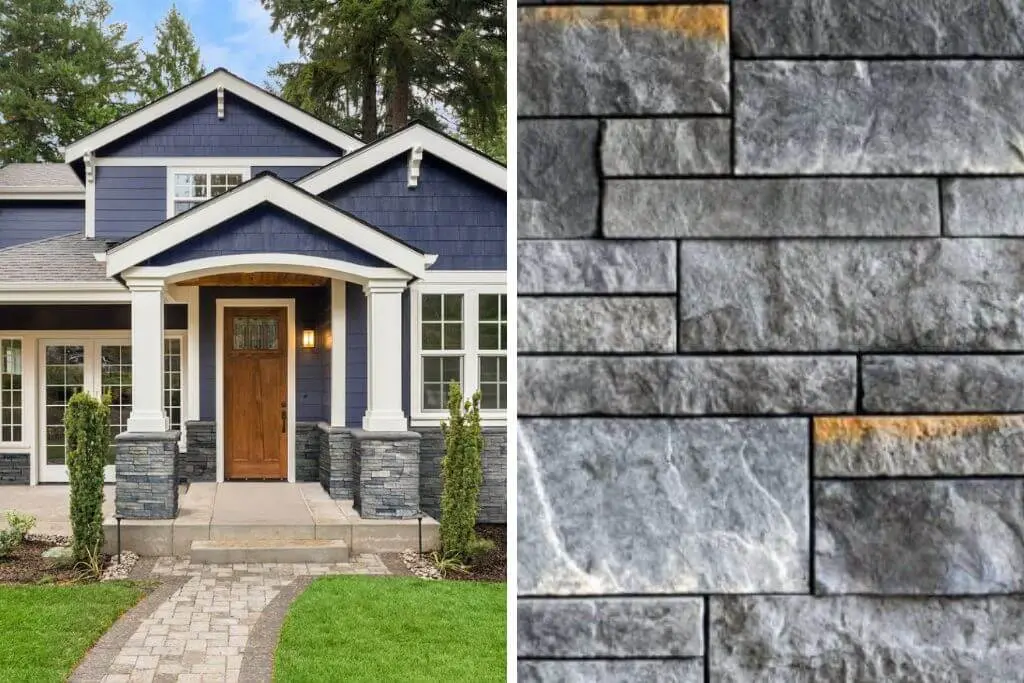
Stone veneer siding is a thin layer of manufactured or natural stone applied to the exterior walls of a structure. Unlike full‑thickness stone, which can weigh up to 200 lb per square foot, veneer panels typically weigh 20–30 lb, reducing structural load and installation costs. The material can be made from real stone slices, fiber‑cement composites, or high‑density polymer mixes, each offering a natural stone look with varying degrees of durability and upkeep.
Key Benefits Over Traditional Siding
- Visual appeal: Provides an upscale, timeless façade that boosts resale value.
- Weight efficiency: Light enough for most wood‑frame homes, eliminating the need for reinforced foundations.
- Insulation boost: When paired with proper sheathing, it can improve R‑values by up to 2 points.
- Weather resistance: Most modern veneers are engineered to resist moisture penetration, freeze‑thaw cycles, and UV degradation.
- Low‑maintenance: Requires only occasional cleaning and sealant checks, far less than real stone.
Choosing the Right Stone Veneer for Your Project

In 2026, the market offers three main categories of stone veneer: natural stone veneer, fiber‑cement veneer, and polymer‑based veneer. Your decision should hinge on budget, climate, and aesthetic goals.
Table of Contents
- What Is Stone Veneer Siding and Why It Matters
- Key Benefits Over Traditional Siding
- Choosing the Right Stone Veneer for Your Project
- 1. Natural Stone Veneer
- 2. Fiber‑Cement Stone Veneer
- 3. Polymer‑Based Stone Veneer
- Budgeting: Installation Cost and ROI
- Step‑by‑Step Installation Guide
- Preparation (Weeks 1‑2)
- Mounting the Veneer (Weeks 2‑4)
- Final Touches (Week 5)
- Maintenance: Keeping Your Stone Veneer Pristine
- Common Pitfalls and How to Avoid Them
- Real‑World Case Study: A Mid‑Century Modern Renovation
- Frequently Asked Questions
- Can stone veneer be installed over existing siding?
- How long does installation typically take?
- Is stone veneer fire‑rated?
- What is the environmental impact?
- Future Trends: What to Expect in Stone Veneer Design
- Bottom Line: Is Stone Veneer Right for You?
1. Natural Stone Veneer
Harvested from quarries, natural stone veneer offers authentic texture and color variation. According to the National Stone Association, sales of natural stone veneer grew 8 % in 2025, driven by high‑end residential projects. However, it is the most expensive option—averaging $12‑$15 per square foot installed—and requires a skilled mason for proper anchoring.
2. Fiber‑Cement Stone Veneer
Fiber‑cement blends cement, sand, and cellulose fibers, then molds them into stone‑like panels. This hybrid is praised for its fire‑rating (Class A) and resistance to rot and insects. The Construction Materials Report 2026 cites an average lifespan of 40 years, making it a cost‑effective middle ground.
3. Polymer‑Based Stone Veneer
Made from high‑density polyurethane or acrylic, polymer veneers are the lightest (≈10 lb per square foot) and often feature snap‑fit installation systems. They excel in coastal regions where salt spray can corrode metal anchors, but they may lack the depth of texture found in natural stone.
Budgeting: Installation Cost and ROI
Installation expenses vary widely. A 2025 survey by the Home Builders Association (HBA) reports the following average costs (materials + labor):
- Natural stone veneer: $12‑$15 / sq ft
- Fiber‑cement veneer: $8‑$11 / sq ft
- Polymer veneer: $6‑$9 / sq ft
When factoring in the typical resale boost of 5‑7 % for stone‑accented homes, homeowners often recoup the investment within 8–10 years. Additionally, the lighter weight can reduce framing material costs, offsetting a portion of the veneer price.
Step‑by‑Step Installation Guide
Whether you’re a DIY enthusiast or hiring a professional, following a systematic approach ensures a flawless finish.
Preparation (Weeks 1‑2)
- Assess structural capacity: Verify that wall studs can support the chosen veneer weight. Reinforce with additional framing if necessary.
- Weatherproof the substrate: Apply a house‑wrap (e.g., Tyvek) and a water‑resistive barrier (WRB) to prevent moisture intrusion.
- Install a drainage plane: A ¼‑inch rain screen creates an air gap, allowing any water that penetrates the veneer to escape.
- Mark layout: Use a chalk line to plan vertical joints, aiming for staggered seams that mimic natural stone patterns.
Mounting the Veneer (Weeks 2‑4)
- Apply adhesive: For fiber‑cement and polymer panels, a polymer‑based construction adhesive is spread in 2‑inch swaths with a notched trowel.
- Set the panels: Press each piece firmly, aligning the pre‑drilled holes with the underlying metal lath or masonry anchors.
- Secure with fasteners: Use corrosion‑resistant stainless‑steel screws or nails, spacing them 12‑inches apart per manufacturer specs.
- Trim and finish: Cut excess material with a wet saw, then apply a breathable sealant to the joints for extra weather protection.
Final Touches (Week 5)
- Inspect all seams for gaps; caulk any openings with a polymer‑based exterior sealant.
- Install trim around windows, doors, and rooflines to create a cohesive look.
- Consider a low‑VOC clear coat for added UV protection, especially for polymer veneers.
Maintenance: Keeping Your Stone Veneer Pristine
One of stone veneer’s biggest selling points is its low‑maintenance nature, but a few annual tasks extend its lifespan.
- Cleaning: Use a garden hose and mild detergent; avoid pressure washers above 1,500 psi to prevent surface erosion.
- Sealant inspection: Reapply a breathable sealer every 5–7 years, particularly in harsh climates.
- Joint monitoring: Look for cracks or loose panels after severe storms; tighten or replace fasteners as needed.
For comprehensive exterior upkeep, see our Vinyl Siding Mastery guide, which offers parallel maintenance tips adaptable to stone veneer.
Common Pitfalls and How to Avoid Them
- Skipping the rain screen: Without a drainage plane, moisture can become trapped, leading to mold and premature veneer failure.
- Improper anchoring: Using standard drywall screws corrodes quickly; always select stainless‑steel or hot‑dip galvanized fasteners.
- Neglecting expansion gaps: Stone expands and contracts with temperature changes; leaving a ¼‑inch joint at the top and bottom of each panel prevents buckling.
- Choosing the wrong veneer for climate: In freeze‑thaw zones, fiber‑cement outperforms polymer options due to superior thermal stability.
Real‑World Case Study: A Mid‑Century Modern Renovation
In March 2026, a 2,800‑sq‑ft home in Austin, Texas, underwent a façade overhaul using fiber‑cement stone veneer. The owners aimed for a rustic yet contemporary look while staying within a $30,000 budget. By integrating a rain screen and opting for a staggered “random coursed” layout, the project achieved a 12‑percent increase in energy efficiency (measured via an DOE Home Energy Rating System (HERS) audit) and a resale uplift projected at $45,000 according to the local MLS.
The contractors referenced our Metal Siding 2026 guide for comparative durability testing, confirming that the selected veneer outperformed metal panels in aesthetic versatility while matching them in lifespan.
Frequently Asked Questions
Can stone veneer be installed over existing siding?
Yes, provided the existing siding is in good condition and a proper WRB and rain screen are added. This method can save demolition costs but may affect the overall thickness, requiring adjustments to window and door trim.
How long does installation typically take?
For a 2,000‑sq‑ft exterior, professional crews usually complete the job in 5–7 days, while a DIY enthusiast might need 2–3 weeks, factoring in learning curves and weather delays.
Is stone veneer fire‑rated?
Fiber‑cement and polymer‑based veneers often carry a Class A fire rating, the highest rating for building materials. Natural stone is inherently non‑combustible, though the mortar and backing materials must also meet fire standards.
What is the environmental impact?
Manufactured veneers use recycled content—up to 30 % post‑consumer waste in many fiber‑cement products—reducing the carbon footprint compared to quarrying natural stone. According to the Environmental Building Council 2025, fiber‑cement veneer emits 40 % less CO₂ per square foot during production.
Future Trends: What to Expect in Stone Veneer Design
By 2028, the industry anticipates a surge in 3‑D printed stone panels, allowing custom textures with minimal waste. Additionally, integration of smart sealants that change color when moisture penetrates is expected to become mainstream, offering homeowners a visual cue for maintenance before damage occurs.
Bottom Line: Is Stone Veneer Right for You?
If you crave the timeless allure of stone without the structural challenges and high cost, stone veneer siding stands out as a versatile, weather‑resistant, and low‑maintenance solution. Evaluate your climate, budget, and design vision, then follow the step‑by‑step guide above—or consult a certified installer—to reap the aesthetic and financial rewards.
Ready to explore other exterior cladding options? Dive into our Hardie Plank Siding 2026 guide for a deep dive into fiber‑cement alternatives that complement stone veneer projects.